Friday, March 30, 2012
almost done with part of a freelance
Tuesday, March 27, 2012
My mobile workspace and some models
Doing some work on a couple of things.
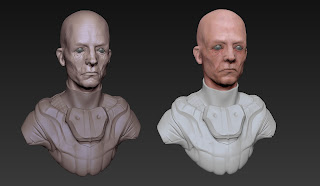
Cant really show a whole lot, but here are a couple of things, I guess space is the theme, first a bit of crew I think I'm going to do some more, they are quick and fun, using the armor from the previous head.
And here is my mobile workspace, I'm all over the place like all the time, and so I decided to rely on a powerful mobile workstation for most of my work (I do have a home desktop in case you are wondering)
I guess most artists want to see how other people work. And for digital guys its pretty similar environments across the board.
The only thing I guess I have to explain is that dohicky resting against the monitor. Thats my color calibrator, it makes sure that the colors on my monitors are not only correct but are the same on both screens. Basically because my laptop's screen isn't the same quality of my monitor, I get my laptop as close as I can to the real thing. It also helps with publications, as print jobs tend to not screw up as much.
Friday, March 16, 2012
Zbrush Mobile classes
Just giving a shout-out to my guys at Pixologic. There classroom has been made mobile for about a few weeks now,
I only just realized I'm one of the images used to show that off :P
to the Classrom!
I only just realized I'm one of the images used to show that off :P
to the Classrom!
Saturday, March 10, 2012
Thursday, March 8, 2012
Ice Cream Shop fight
An Idea I had that I'm using for a full on modeling reel.
Two kids fighting over a girl in an ice cream parlor, being stopped by the owner. Should be fun!
Two kids so far:
UPDATE:
Good kid
Bad Kid:
And some quick Maya screen grabs. Just blocking in the shop for now.
Two kids fighting over a girl in an ice cream parlor, being stopped by the owner. Should be fun!
Two kids so far:
UPDATE:
Good kid
Bad Kid:
And some quick Maya screen grabs. Just blocking in the shop for now.
Friday, March 2, 2012
Zombie Boy tutorial
After tweaking a bunch of stuff, I decided to do a quick break down of how I went about doing this image.
After doing the Alien and Zombie Boy I received a few emails asking me about different techniques I used in making it, so I figured to answer any and all questions I would go in and break it down from beginning to end.
Modeling
So first I started with the base mesh of a kid project that I did, and modified to to how I needed it to be I immediately saw this staggering zombie lurching forward in my head.
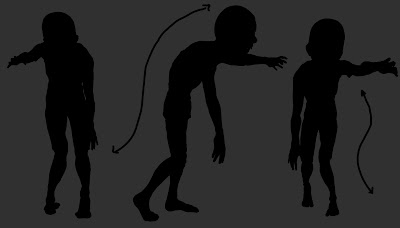
Now its very important to note at this point and all points in the process that I'm constantly looking at and adjusting the silhouette. This is probably the most important part of the sculpting process, as it will determine how your figure reads when compared to any background.
This image below shows perspective turned off, my mistake I admit, so its not a real example, but I do want to put something here to illustrate the point. It really is important.
As for pore detail, those that know me know I can be a bit of an impatient person when it comes to stuff like that (something I'm working on as an artist.) I do relish in use of the surface noise plugin in zbrush. By masking off and applying different variations of noise, I can quite quickly lay down a dynamic looking set of pores.
I then set the clay polish tool to -1 and surface to +1 and it gives me a natural blurring of the pores into the skin.
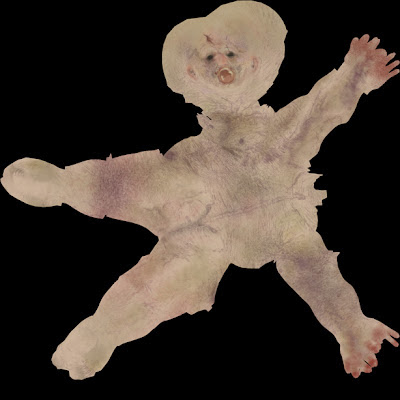
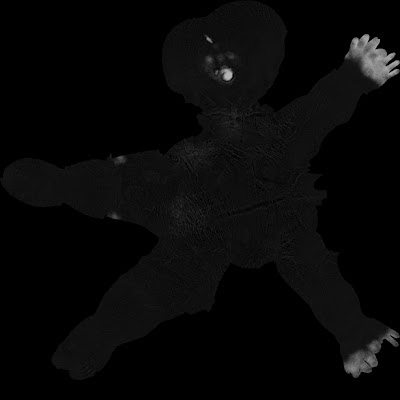
At this point I'm ready to UV. Using the plugin UV Master, I do a quick and dirty rip of the mesh. It was good enough for me to edit. I know the head is oddly placed, but it worked for what I needed it to do.
Planning and Maya
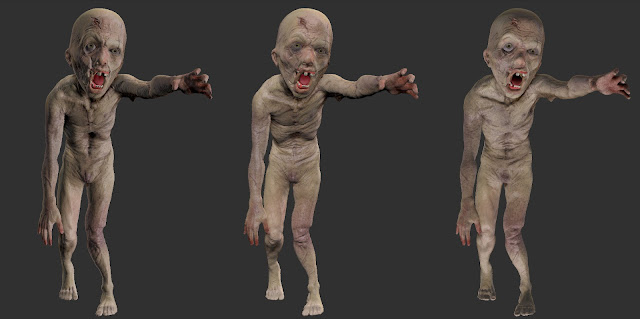
So now with texture at hand I begin looking for a set up that I feel is what I want in my final image. I decided to go with the center one in this case.
Taking a cue from the "Make it look real with Mental Ray" tutorial, I then exported a normal map for the 4th level of detail. I then created a low res displacement map (about 1024px) for any detail lvl 4 and beyond that needed that extra pop.
And then it was on to maya. With everything ported in I began first with lighting, to recreate what I did in Zbrush. I came up with using two spotlights, one with Area light turned on. Its a bit different than using an area light, I feel I can get a sharp/soft mix that I want quicker that way.
I then assigned the Mental Ray Fast skin shader to pretty much every thing haha. I didn't touch the values, I could have but in in seeing so many Vray renders with default settings I said "why cant mental ray?" Master Zap took a lot of time making sure those values matched what was accurate for flesh, and so I only scaled the effect to fit the character and lowered the sub-dermal weight (as he was dead)
some texture samples :
Finally I rendered with FG on and a simple color for environment. Then I took it into photoshop and finished it.
I now adjusted said image here (just adjusted curves a bit):
After doing the Alien and Zombie Boy I received a few emails asking me about different techniques I used in making it, so I figured to answer any and all questions I would go in and break it down from beginning to end.
Modeling
So first I started with the base mesh of a kid project that I did, and modified to to how I needed it to be I immediately saw this staggering zombie lurching forward in my head.
And so began detailing the thing. I wont lie, I don't like using a lot of brushes. I do love the clay buildup brush. It allows me to work fast and frenzied. I set this to a low intensity and really grow the form.
I tend to go in periodically with the DMS standard brush, and chisel in details that I know will be needed later one. once everything is really set, on the lower levels I go in with the soft form brush and build up what I missed.
I don't like using the inflate tool too much, only because it tends to get tricky to use on higher levels.
Now its very important to note at this point and all points in the process that I'm constantly looking at and adjusting the silhouette. This is probably the most important part of the sculpting process, as it will determine how your figure reads when compared to any background.
This image below shows perspective turned off, my mistake I admit, so its not a real example, but I do want to put something here to illustrate the point. It really is important.
I then set the clay polish tool to -1 and surface to +1 and it gives me a natural blurring of the pores into the skin.
Texturing & UVs
Texturing is something that I truly love in zbrush. Mudbox fanboys will piss and moan about per poly painting, but the speed at which I can paint naturalistic textures is something I love. To make it simple, my texturing process for all of my models is the same. I start with a dark color, and work lighter. Its an additive process that I feel really works well.
As for painted skin textures (as many asked about the alien piece I did) the trick is to not pain solid colors. Granted looking at it now I probably could have pushed the textures a bit more, but in any case the brushes used was a standard brush set to color spray, with a speckled alpha.
I set the spray to around .7 so that I get an even coat, without seeing the actually edge of the apha, or seeing it repeat.
I like to mask off, the cavities, and fill with a 3% dark tone, its not really visible but does get picked up in maya.
The teeth and tongue were done the same way.
At this point I'm ready to UV. Using the plugin UV Master, I do a quick and dirty rip of the mesh. It was good enough for me to edit. I know the head is oddly placed, but it worked for what I needed it to do.
Planning and Maya
So now with texture at hand I begin looking for a set up that I feel is what I want in my final image. I decided to go with the center one in this case.
Taking a cue from the "Make it look real with Mental Ray" tutorial, I then exported a normal map for the 4th level of detail. I then created a low res displacement map (about 1024px) for any detail lvl 4 and beyond that needed that extra pop.
And then it was on to maya. With everything ported in I began first with lighting, to recreate what I did in Zbrush. I came up with using two spotlights, one with Area light turned on. Its a bit different than using an area light, I feel I can get a sharp/soft mix that I want quicker that way.
I then assigned the Mental Ray Fast skin shader to pretty much every thing haha. I didn't touch the values, I could have but in in seeing so many Vray renders with default settings I said "why cant mental ray?" Master Zap took a lot of time making sure those values matched what was accurate for flesh, and so I only scaled the effect to fit the character and lowered the sub-dermal weight (as he was dead)
some texture samples :
Finally I rendered with FG on and a simple color for environment. Then I took it into photoshop and finished it.
I now adjusted said image here (just adjusted curves a bit):
Subscribe to:
Posts (Atom)

